Developer Guide
To start using the MapStore geOrchestra project as a developer you need the following:
- install the needed requirements:
NodeJS (>=8)
JDK (>= 8)
Maven (>= 3.x)
clone the GitHub repository:
git clone --recursive https://github.com/georchestra/mapstore2-georchestra
from the cloned source, install the dependencies from the npm registry:
npm install
do a full build using the build script:
./build.sh
Configuring the backend
To develop locally you will need to use a proxied backend. To configure your backend of choice you need to properly change the webpack.config.js file, in particular you need to change the following variables:
DEV_PROTOCOL: http or https
DEV_HOST: host and port of the backend
const DEV_PROTOCOL = "http";
const DEV_HOST = "localhost:8080";
- You can either:
use an online backend
deploy and run your just build backend on a Tomcat instance
To deploy your local backend you will need to:
copy the mapstore.war from web/target to your Tomcat webapps folder
create a local geOrchestra datadir anywhere in your PC and copy the following inside it:
a standard geOrchestra
default.propertiesfile with generic configuration (database and LDAP settings for example)the datadir/mapstore folder from web/target/geOrchestra with the mapstore specific configuration files
add the georchestra.datadir environment variable to the Tomcat setenv script to point to your datadir folder
-Dgeorchestra.datadir=/etc/georchestra
properly change the configuration files, in particular to set the database and LDAP repository connection settings
If you don’t have a local database and LDAP repository properly configured for geOrchestra you can use remote ones. Remember: to use a local backend both a PostgreSQL database and LDAP repository needs to be available and properly populated.
Developing the frontend
To start the frontend locally, just run:
npm start
Your application will be available at http://localhost:8081
Mocking security
When working locally you won’t have the security proxy authentication enabled, but you can simulate it using a specific Chrome extension called ModHeader.
Install this extension and configure it to set the following request headers:
sec-username: the username logged in
sec-roles: a semicolon delimited list of roles (e.g. ROLE_MAPSTORE_ADMIN)
Remember to disable the extension when you don’t need it.
Styling and theming
MapStore2 allow to customize default theme or create new one.
- You can either:
Custom or create a new theme to style a specific context
Change the default mapstore2 theme
Note that currently, only the webapp build process allow to compile themes/foo/foo.less files to .css files (see lesscss.org).
So, to create a new theme you have to :
To use a theme in the context creator when you create or edit a context, open localConfig.json and add the theme in the contextCreator config :
{
    "name": "ContextCreator",
    "cfg": {
        "themes":[
            {"id":"foo","type":"link","href":"dist/themes/foo.css"},
            {"id":"default","type":"link","href":"dist/themes/default.css"}
        ]
    }
}
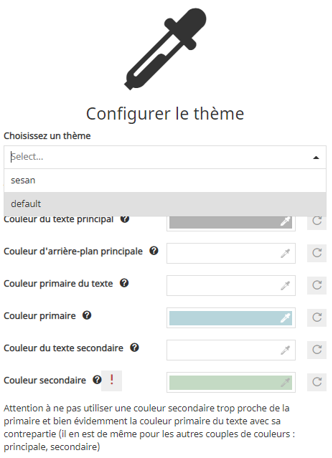
This theme is now available and you can custom it from the contextCreator UI :
Next, to change the default theme you have to open the localConfig.json and change defaultState.theme config (where foo is available as /dist/themes/foo/foo.css):
"defaultState": {
    "theme":{
      "selectedTheme":{
        "id": "foo"
      }
    }
}